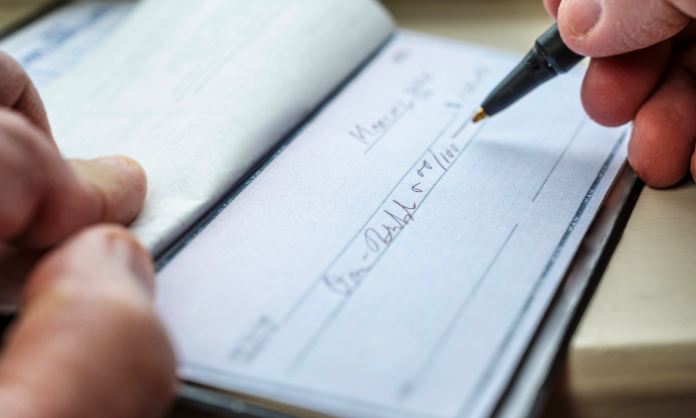
Even though digital payment methods have become widely popular, checks are still used for various transactions. Let’s find out How To Write A Check?
If you have started your own business, writing a check would matter more. You have to make multiple significant transactions frequently from your business account.
The transaction might fail if you don’t know the professional methods to write a cheque.
Most small businesses have developing relationships with clients. At this stage, such faults may be detrimental.
That’s why small business owners need to learn this skill ASAP.
So, it’s essential to know how to write a check. Maybe you don’t write a check regularly, or you have never written a check before; this article will help you with the step-by-step process of writing a check.
How does this article help?
Here, I have explained one step by another, but you can fill in the details in any order you want. Ensure you don’t miss any vital information no matter how you fill in the details. I recommend you fill out the check from top to bottom so you don’t miss anything by mistake.
Steps On How To Write A Check?

Although you can write the check the way you want, it’s better to fill in the details in the following manner.
- Put the date
- Fill in the name of the payee (person or organization).
- Write the amount in numbers in the box next to the ‘$’ symbol.
- Next, write the amount in words in the long text line.
- Put your signature at the bottom right corner.
- Optional: Here, you can add a note in the bottom-left corner where it says “MEMO:” or “RE:”
Understand in Detail How to Write a Check
Here is a detailed explanation of every step so that you don’t make any mistakes while filling in the details.
Step 1: Put The Date
First and foremost, put the date on the top right corner of the check. It will help to know when you wrote this. It’s important because a check has a validity period, after which it becomes invalid and called a stale check.
Sharing a stale check can harm a small or emerging business’s reputation.
Step 2: Write Name Of Payee
In the following line, you have to write the payee’s name. You can also write “cash” if unsure about the name.
However, it’s riskier because anyone can get the cash out. So, confirming the name and writing it before you give it to the payee is better.
Have you stepped into your business recently?
Indeed, you will be prone to errors. However, business owners can’t make fundamental errors like writing wrong payee names on cheques.
Step 3: Write Amount In Numeric Forms
You have to write the amount in two spots on the check. First, you have to write it on the box in numeric form.
A small rectangular box is next to the dollar ($) symbol, where you must write the amount numerically. For example, 150.55.
If you are into a small business, you would write off cheques repeatedly. But don’t make errors while writing numbers.
Ensure that you write the amount in numerical form neatly and clearly so that the person, bank, or ATM can easily understand it.
Step 4: Write Amount In Words
Next, you need to write the amount in words. Here you have to be careful about the cents value. If the amount includes some cents, you need to mention it over 100. Let’s take the above example of $150.55. After writing the amount in numeric form, you need to write it in words as: “One Hundred Fifty and 55/100.” If the amount is round, that means there are no cents (e.g., $150.00), then also you have to follow the same format as: “One Hundred Fifty and 00/100.”
Step 5: Write A Note (MEMO) – It’s Optional
Among various parts of the check, this part is optional, but it’s useful to know why you wrote the check. In the memo area, you can simply write “Water Bill” or “Rent for Month Name” for paying any bills. Sometimes the company might ask you to mention your account number in the memo area if you are paying through check.
Step 6: Put Your Signature
Finally, you have to put your signature in the bottom-right corner. Ensure that you have put the same signature that you used while opening the checking account. Any mismatch in the signature can lead to the cancellation of the check. Again, a check is invalid without your signature. So, it’s the final and also crucial step of how to write a check guide.
FAQs On How To Write A Check
I have described how to write a check with the necessary details. Here are some frequently asked questions that you can read to get some more clarity.
Ans: As mentioned above, the five easy steps to writing a check are as follows:
1) Fill in the date.
2) Write the name of the payee in the next line.
3) Write the amount in numeric form in the box next to the dollar symbol.
4) Write the amount in words in the next line provided for amounts.
5) Finally, put your signature on the bottom-right corner of the check.
Ans: As you know that you have to write the amount two times; (1) numeric form, (2) word form. In numeric form, write 500.00 in the box right next to the dollar ($) symbol. In other words, you have to write “Five Hundred and 00/100” or “Five Hundred Only” in the line provided for amounts in words.
Ans: When writing in words, you might face two situations; (1) First, the amount is only in dollars without any cents, (2) Second case, the amount is with cents. Let’s understand this with an example. For the first case, if it’s 150 dollars only: write “One Hundred Fifty and 00/100” or “One Hundred Fifty Only.” For the second case, if the amount is ($ 150.35): write “One Hundred Fifty and 35/100.”
The Bottom Line
Hopefully, the above information has helped you learn how to write a check correctly in simple steps. Keep a few things in mind while writing a check. Write neatly and try to avoid cursive writing for the purpose of clarity. In case there are any errors or mistakes, write a new one. After writing, always double-check that you have written the name of the recipient and the amount correctly.
Read Also:


Leave A Comment